If you’re a fan of quick, no-bake desserts, this Butterfinger Balls recipe is about to be your new favorite. They’re rich, creamy, crunchy, and loaded with that unmistakable Butterfinger flavor we all grew up loving. I first made these with my kids for a holiday party, and they disappeared in minutes. The best part? You only need a few ingredients and a little bit of time. Perfect for parties, gifting, or anytime you need a sweet bite fast!
Table of Contents
Why You’ll Love These Butterfinger Balls
These Butterfinger Balls are sweet, crunchy, chocolatey, and totally irresistible. They’re super easy to make, require no baking, and are a hit with both kids and adults. The creamy peanut butter center mixed with crushed Butterfingers gives each bite the perfect balance of smooth and crunchy. Whether you’re whipping these up for a holiday tray, game day dessert, or just a late night snack, they’ll definitely hit the spot. Plus, they freeze beautifully if you want to save some for later!
Ingredients You’ll Need
Essential Ingredients

To make these no bake Butterfinger Balls, here’s what you’ll need:
- Creamy peanut butter, the base that holds everything together.
- Powdered sugar, for sweetness and structure.
- Crushed Butterfinger candy bars, the star ingredient, of course.
- Salted butter, adds richness to the filling.
- Semi sweet chocolate chips or melting wafers, for the outer coating.
- Optional: Sprinkles or crushed candy for topping.
Note: You can find the printable recipe with exact measurements below.
Different Candy Bar Options
If you don’t have Butterfingers on hand or just want to mix things up, try using crushed Reese’s, Snickers, or Crunch bars instead. Each one adds its own unique twist, and they all work beautifully in this recipe. My sister once used KitKats, and they turned out surprisingly amazing with the creamy peanut butter base!
Nut Free Alternatives
Need a nut free version? Swap the peanut butter for sunflower seed butter or soy nut butter. Both have a similar texture and work great in this recipe. I made a batch with sunflower seed butter for a school party, and not a single kid noticed the difference. Just be sure to check labels for cross contamination if needed.
Chocolate Coating Choices
Semi sweet chocolate is a classic, but you’ve got options! Try white chocolate for a sweeter touch, dark chocolate for a rich twist, or even butterscotch chips for something fun and different. I love drizzling white chocolate over dark coated ones for a bakery style finish. Use candy melts if you want smoother dipping without the fuss of tempering.
How to Make Butterfinger Balls
Step by Step Guide

Crush the Butterfingers:
Start by unwrapping your Butterfinger bars and placing them in a large zip top bag. Use a rolling pin to crush them into small, crunchy pieces. You don’t want a fine powder, leave some texture for that signature crunch in every bite. You can also pulse them in a food processor if that’s easier. My kids love helping with this part, just a warning, it gets loud and a little messy, but that’s half the fun!
Mix with Peanut Butter and Sugar:
In a large mixing bowl, stir together the peanut butter, softened butter, and powdered sugar until smooth. Then fold in the crushed Butterfingers until everything’s evenly combined. The mixture will be thick and sticky, almost like cookie dough. If it feels too soft, pop it in the fridge for 10 minutes to firm up. I always sneak a little taste here, it’s rich, peanut buttery, and filled with candy crunch. You’ll be tempted to eat it by the spoonful!
Shape into Balls:
Once the mixture is firm enough to handle, use a small cookie scoop or spoon to scoop out portions. Roll each one between your hands to form smooth, bite sized balls, about 1 inch wide. Place them on a parchment lined baking sheet as you go. It helps to lightly grease your hands or wear gloves if the mixture sticks. When I make these for parties, I like to double the batch, they go fast!
Chill Before Dipping:
Pop the tray of rolled balls into the fridge for at least 30 minutes or into the freezer for about 15. Chilling is key because it helps the balls hold their shape when you dip them in melted chocolate later. If they’re too soft, they’ll fall apart in the chocolate. I usually clean up the kitchen or prep the toppings while they chill, or if I’m honest, I scroll recipes and snack on leftovers.
Coat in Melted Chocolate:
Melt your chocolate chips or wafers in a microwave safe bowl, stirring every 20 to 30 seconds until smooth. Dip each chilled ball into the chocolate using a fork or toothpick, then let the excess drip off before placing it back on the parchment paper. Add sprinkles or crushed candy while the coating is still wet if you want to dress them up. I always drizzle a little extra chocolate on top, it makes them look fancy with almost no effort!
Optional Add Ons and Decorations
Sprinkle Toppings or Drizzles:
Before the chocolate sets, add a little flair with colorful sprinkles, crushed Butterfinger bits, or a drizzle of white chocolate. It’s a simple way to make them look bakery worthy. When I make these for birthday parties, I match the sprinkles to the theme. They’re always the first treat to disappear from the dessert table!
Festive Holiday Themes:
You can easily dress these up for holidays! Use red and green sprinkles for Christmas, orange and black for Halloween, or pastel shades for Easter. I even made heart shaped ones for Valentine’s Day once, just chill the mixture and press it into mini silicone molds. Little touches like this make them feel extra special for any occasion.
Helpful Tips and Tricks
How to Get the Best Texture and Shape:
For the perfect Butterfinger Balls texture, make sure your peanut butter and butter are well softened before mixing. This helps everything blend smoothly. Don’t skip chilling the mixture, it firms up the dough and makes rolling way easier. If the mix feels too sticky, add a little extra powdered sugar. I like using a cookie scoop for even portions, then gently rolling them in my hands for a uniform look. They come out round, neat, and just the right size.
Avoiding Messy Chocolate Dips:
To keep the dipping clean, always chill your Butterfinger Balls first, cold balls hold up better in warm chocolate. Use a fork or toothpick to dip each one, and gently tap off the excess before setting them down. Work in batches so the rest stay chilled while you dip. If your chocolate starts to thicken, reheat it in short bursts. I like placing a baking rack over parchment paper to catch any drips for easy cleanup.
How to Serve Butterfinger Balls

Fun Ways to Present Them:
Presentation is everything when it comes to desserts, and these little treats shine with just a few simple touches. Arrange them on a pretty platter with parchment paper or stack them in mini cupcake liners for an easy grab and go treat. For parties, I love placing them in mason jars tied with ribbon, they make super cute gifts. You can even stick them on lollipop sticks to turn them into fun Butterfinger pops that kids absolutely love.
What Goes Well With Butterfinger Balls:
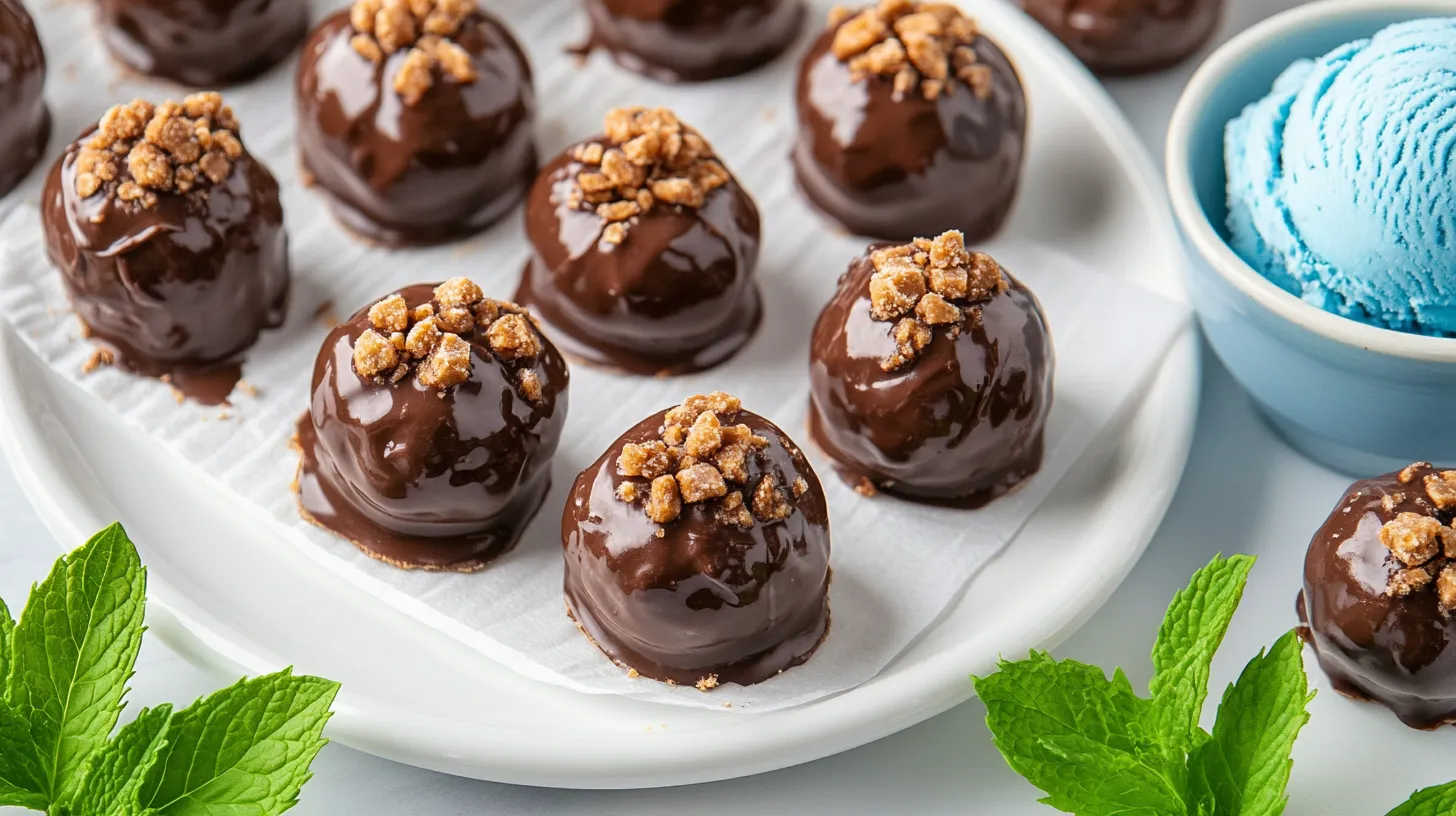
These sweet bites pair wonderfully with a scoop of ice cream or a warm drink like hot cocoa or coffee. If you want to build a dessert platter, mix them with brownies, cookies, or chocolate covered pretzels for a rich and indulgent spread. Pair them with Blue Cookie Ice Cream Recipe for a fun and colorful combo that is perfect for birthdays or summer parties, it is a total crowd pleaser!
Butterfinger Balls Nutrition Facts
Estimated Calories and Serving Info:
Here is a quick look at the estimated nutrition for each Butterfinger Ball, based on standard ingredients and portion size. Keep in mind that this can vary slightly depending on the candy bars and chocolate you use, or any custom tweaks you make. These are sweet treats, so enjoy them in moderation, they are totally worth it!
| Nutrient | Amount per Serving | Notes |
|---|---|---|
| Calories | 180 kcal | Approximate per ball |
| Protein | 2g | Mostly from peanut butter |
| Carbohydrates | 20g | From sugar and candy coating |
| Fat | 10g | Mainly from peanut butter |
| Saturated Fat | 4g | From chocolate and butter |
| Cholesterol | 5mg | Small amount from butter |
| Sodium | 85mg | Depends on peanut butter used |
| Fiber | 1g | From chocolate and peanut base |
| Sugar | 15g | From powdered sugar and candy |
| Calcium | 2% DV | Small amount from butter |
How to Make Them a Bit Lighter:
Want to lighten them up a little? Try using powdered peanut butter mixed with a bit of water instead of regular peanut butter. You can also reduce the amount of powdered sugar or swap it for a sugar substitute like stevia blend. And for the chocolate coating, choose a dark chocolate with higher cacao, it has less sugar and more antioxidants.
How to Store & Reheat For Later
Storing in the Fridge or Freezer:
Butterfinger Balls store really well, which makes them perfect for prepping ahead. Just place them in an airtight container with parchment paper between the layers to keep them from sticking. You can store them in the fridge for up to 7 days, or pop them in the freezer for up to 2 months. I usually make a big batch and freeze half, it is like finding hidden treasure when you need a quick treat later!
Tips for Thawing and Enjoying Later:
If you are pulling them from the freezer, let them sit at room temperature for about 20 minutes before serving. They will soften up just enough to get that creamy center and crunchy coating. Do not microwave them, the chocolate may melt unevenly. I like to set out a few before dinner so they are the perfect texture by dessert time. They are also surprisingly good straight from the fridge if you like your treats with a little extra chill.
Frequently Asked Questions
Can I use natural peanut butter for this recipe:
You can, but the texture might be a little looser since natural peanut butter is usually runnier and less sweet. If you go this route, mix in a bit more powdered sugar to help firm things up. I have tried it before, and while it works, the classic creamy peanut butter gives a more stable and flavorful result for these treats.
What type of chocolate works best for coating:
Semi sweet or dark chocolate chips work great, but chocolate melting wafers or almond bark are even easier if you are new to dipping. They melt smoother and do not require tempering. I like using a mix, dark chocolate for richness and a drizzle of white chocolate on top for contrast. It makes them look like you picked them up from a fancy candy shop!
How can I prevent the chocolate from cracking:
Cracking usually happens when the inside is too cold and the chocolate sets too fast. Let the chilled balls sit out for 5 minutes before dipping to take off the freezer chill. Also, do not overheat the chocolate, warm it slowly in short bursts. I always test dip one first to make sure everything is the right temperature before committing to the whole batch.
Are there any nut free alternatives:
Yes, you can swap peanut butter for sunflower seed butter or soy nut butter to keep the recipe nut free. Just make sure the substitute is thick and creamy, not too oily. My neighbor’s son has a peanut allergy, and we have made these with SunButter several times. They still taste amazing, and nobody even notices the difference unless you tell them.
Can I make these in advance:
Absolutely, they are perfect for making ahead! You can prep the mixture, roll the balls, and store them in the fridge or freezer until you are ready to dip in chocolate. Or make the whole batch, coat them, and refrigerate for up to a week. I always make mine the night before a party so I am not scrambling on the day of.
Do I need to refrigerate Butterfinger Balls:
Yes, it is best to keep them chilled so they stay firm and the chocolate coating does not soften or melt. Store them in the fridge if you are eating them within the week, or freeze them for longer storage. I like serving them slightly chilled, it gives that perfect snap to the chocolate and keeps the peanut butter center creamy and cool.
More Easy Dessert Recipes
If you are looking for more easy and delicious desserts to try, here are a few of my favorites:
- Oreo Mug Cake Recipe: This quick, no bake treat is perfect for when you need a single serving of rich, chocolatey goodness in just minutes.
- Strawberry Swirl Cheesecake Recipe: A creamy cheesecake with a fruity twist that is sure to impress.
- Peach Crumble Recipe: A warm, crispy dessert that is perfect for any season, especially when peaches are in peak season.
Feel free to explore these and find your next favorite sweet treat!

Butterfinger Balls
Equipment
- Mixing Bowl
- Baking Sheet
Ingredients
Filling
- 1 cup creamy peanut butter softened
- ½ cup salted butter softened
- 2 cups powdered sugar
- 3 Butterfinger candy bars crushed
Coating
- 1 ½ cups semi-sweet chocolate chips
- sprinkles optional
Instructions
- Crush Butterfinger candy bars into small pieces and set aside.
- Combine peanut butter, softened butter, and powdered sugar in a mixing bowl until smooth and well combined.
- Fold in crushed Butterfinger pieces, roll mixture into 1-inch balls, and place on a parchment-lined baking sheet.
- Chill the balls in the refrigerator for 30 minutes to firm up.
- Heat chocolate chips until melted and smooth, dip each chilled ball in chocolate, then return to baking sheet.
- Add sprinkles if desired, then chill again until chocolate is set.